Figma MCP
你如果是开发者,需要让 AI 识别 Figma 并实现原型的框架,可以利用这个 MCP 加速你的开发,并且他会帮你读取和自动下载好素材,提升你的效率。
更多请看我的视频: [Cursor+MCP: 1 分钟提效 Figma 到代码]
安装和使用
如果只是想读取 Figma 进行开发,推荐使用 Github - GLips/Figma-Context-MCP 链接我就不发了,能耐心看这篇文章的应该大多是开发者应该知道怎么找。
另外不推荐 sonnylazuardi/cursor-talk-to-figma-mcp , bug 特别多,windows 平台有很多恶性 bug 完全用不了。Mac 平台也有很多 bug,比如你配置了梯子,很可能就会遇到一些恶性 bug,也是目前不推荐的。另外这个 MCP tools 特别多,容易让 cursor 不知道用什么 tools,也会影响你正常的 cursor 使用。
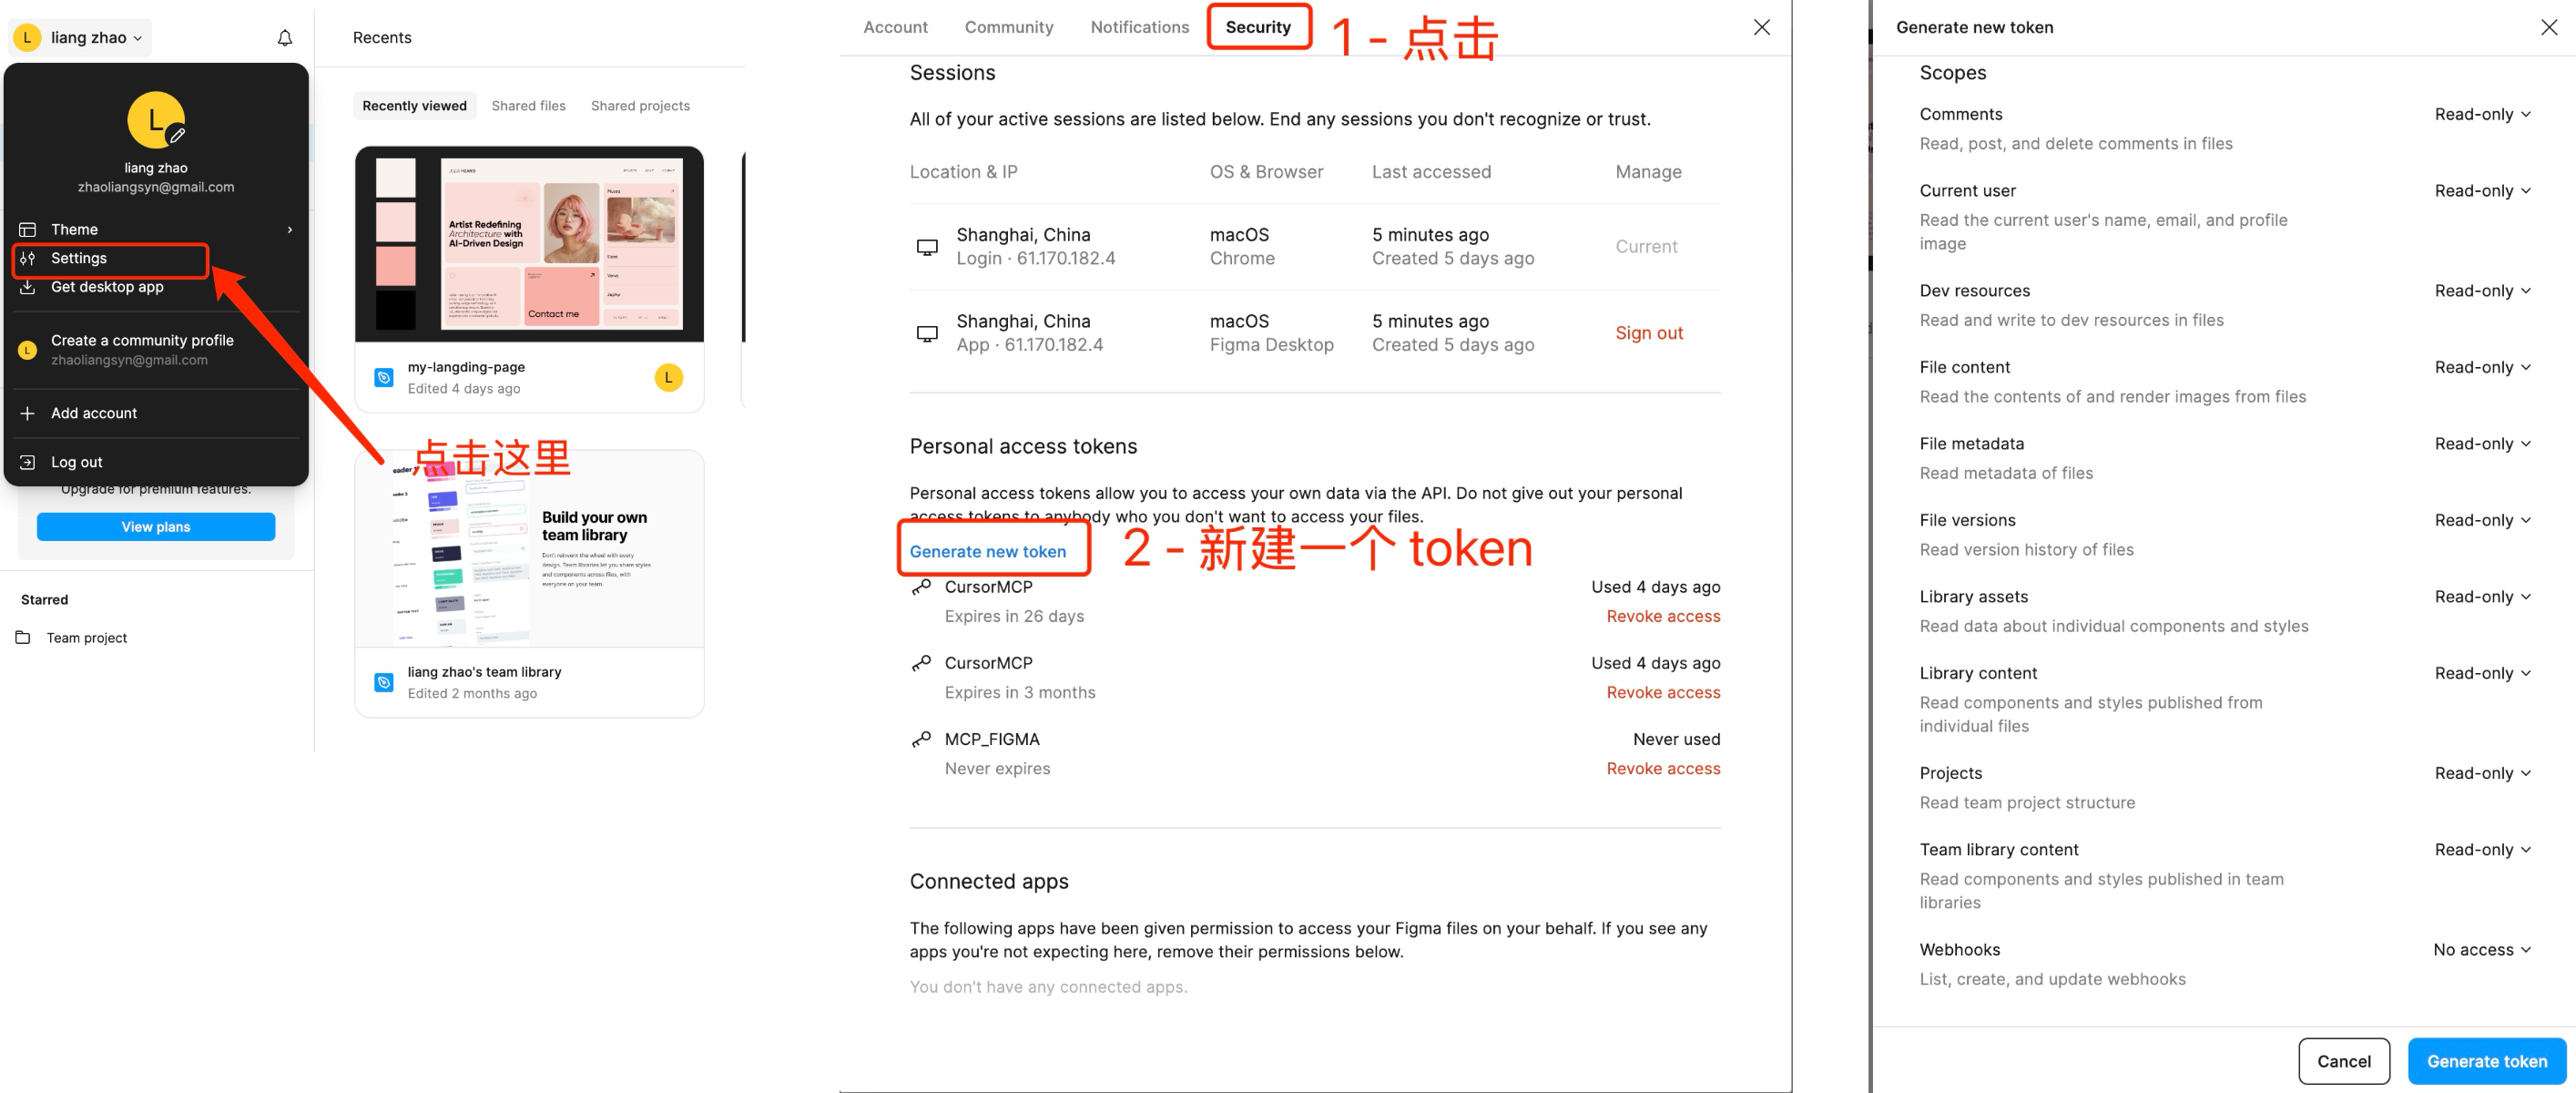
Figma API key 获取
打开你的 Figma 项目的 settings/security 新建一个 Personal Access Token,设置合理的权限,然后保存好!
Cursor 项目集成
Cursor 项目里面推荐项目级安装,在你的项目目录下面新建一个目录 .cursor
然后新建一个文件 mcp.json (相对路径: .cursor/mcp.json) 放入以下内容
API Key 记得替换
MacOS / Linux:
{
  "mcpServers": {
    "Framelink Figma MCP": {
      "command": "npx",
      "args": ["-y", "figma-developer-mcp", "--figma-api-key=YOUR-KEY", "--stdio"]
    }
  }
}
Windows:
{
  "mcpServers": {
    "Framelink Figma MCP": {
      "command": "cmd",
      "args": ["/c", "npx", "-y", "figma-developer-mcp", "--figma-api-key=YOUR-KEY", "--stdio"]
    }
  }
}
确认是否正常启用:

如何使用 Figma MCP
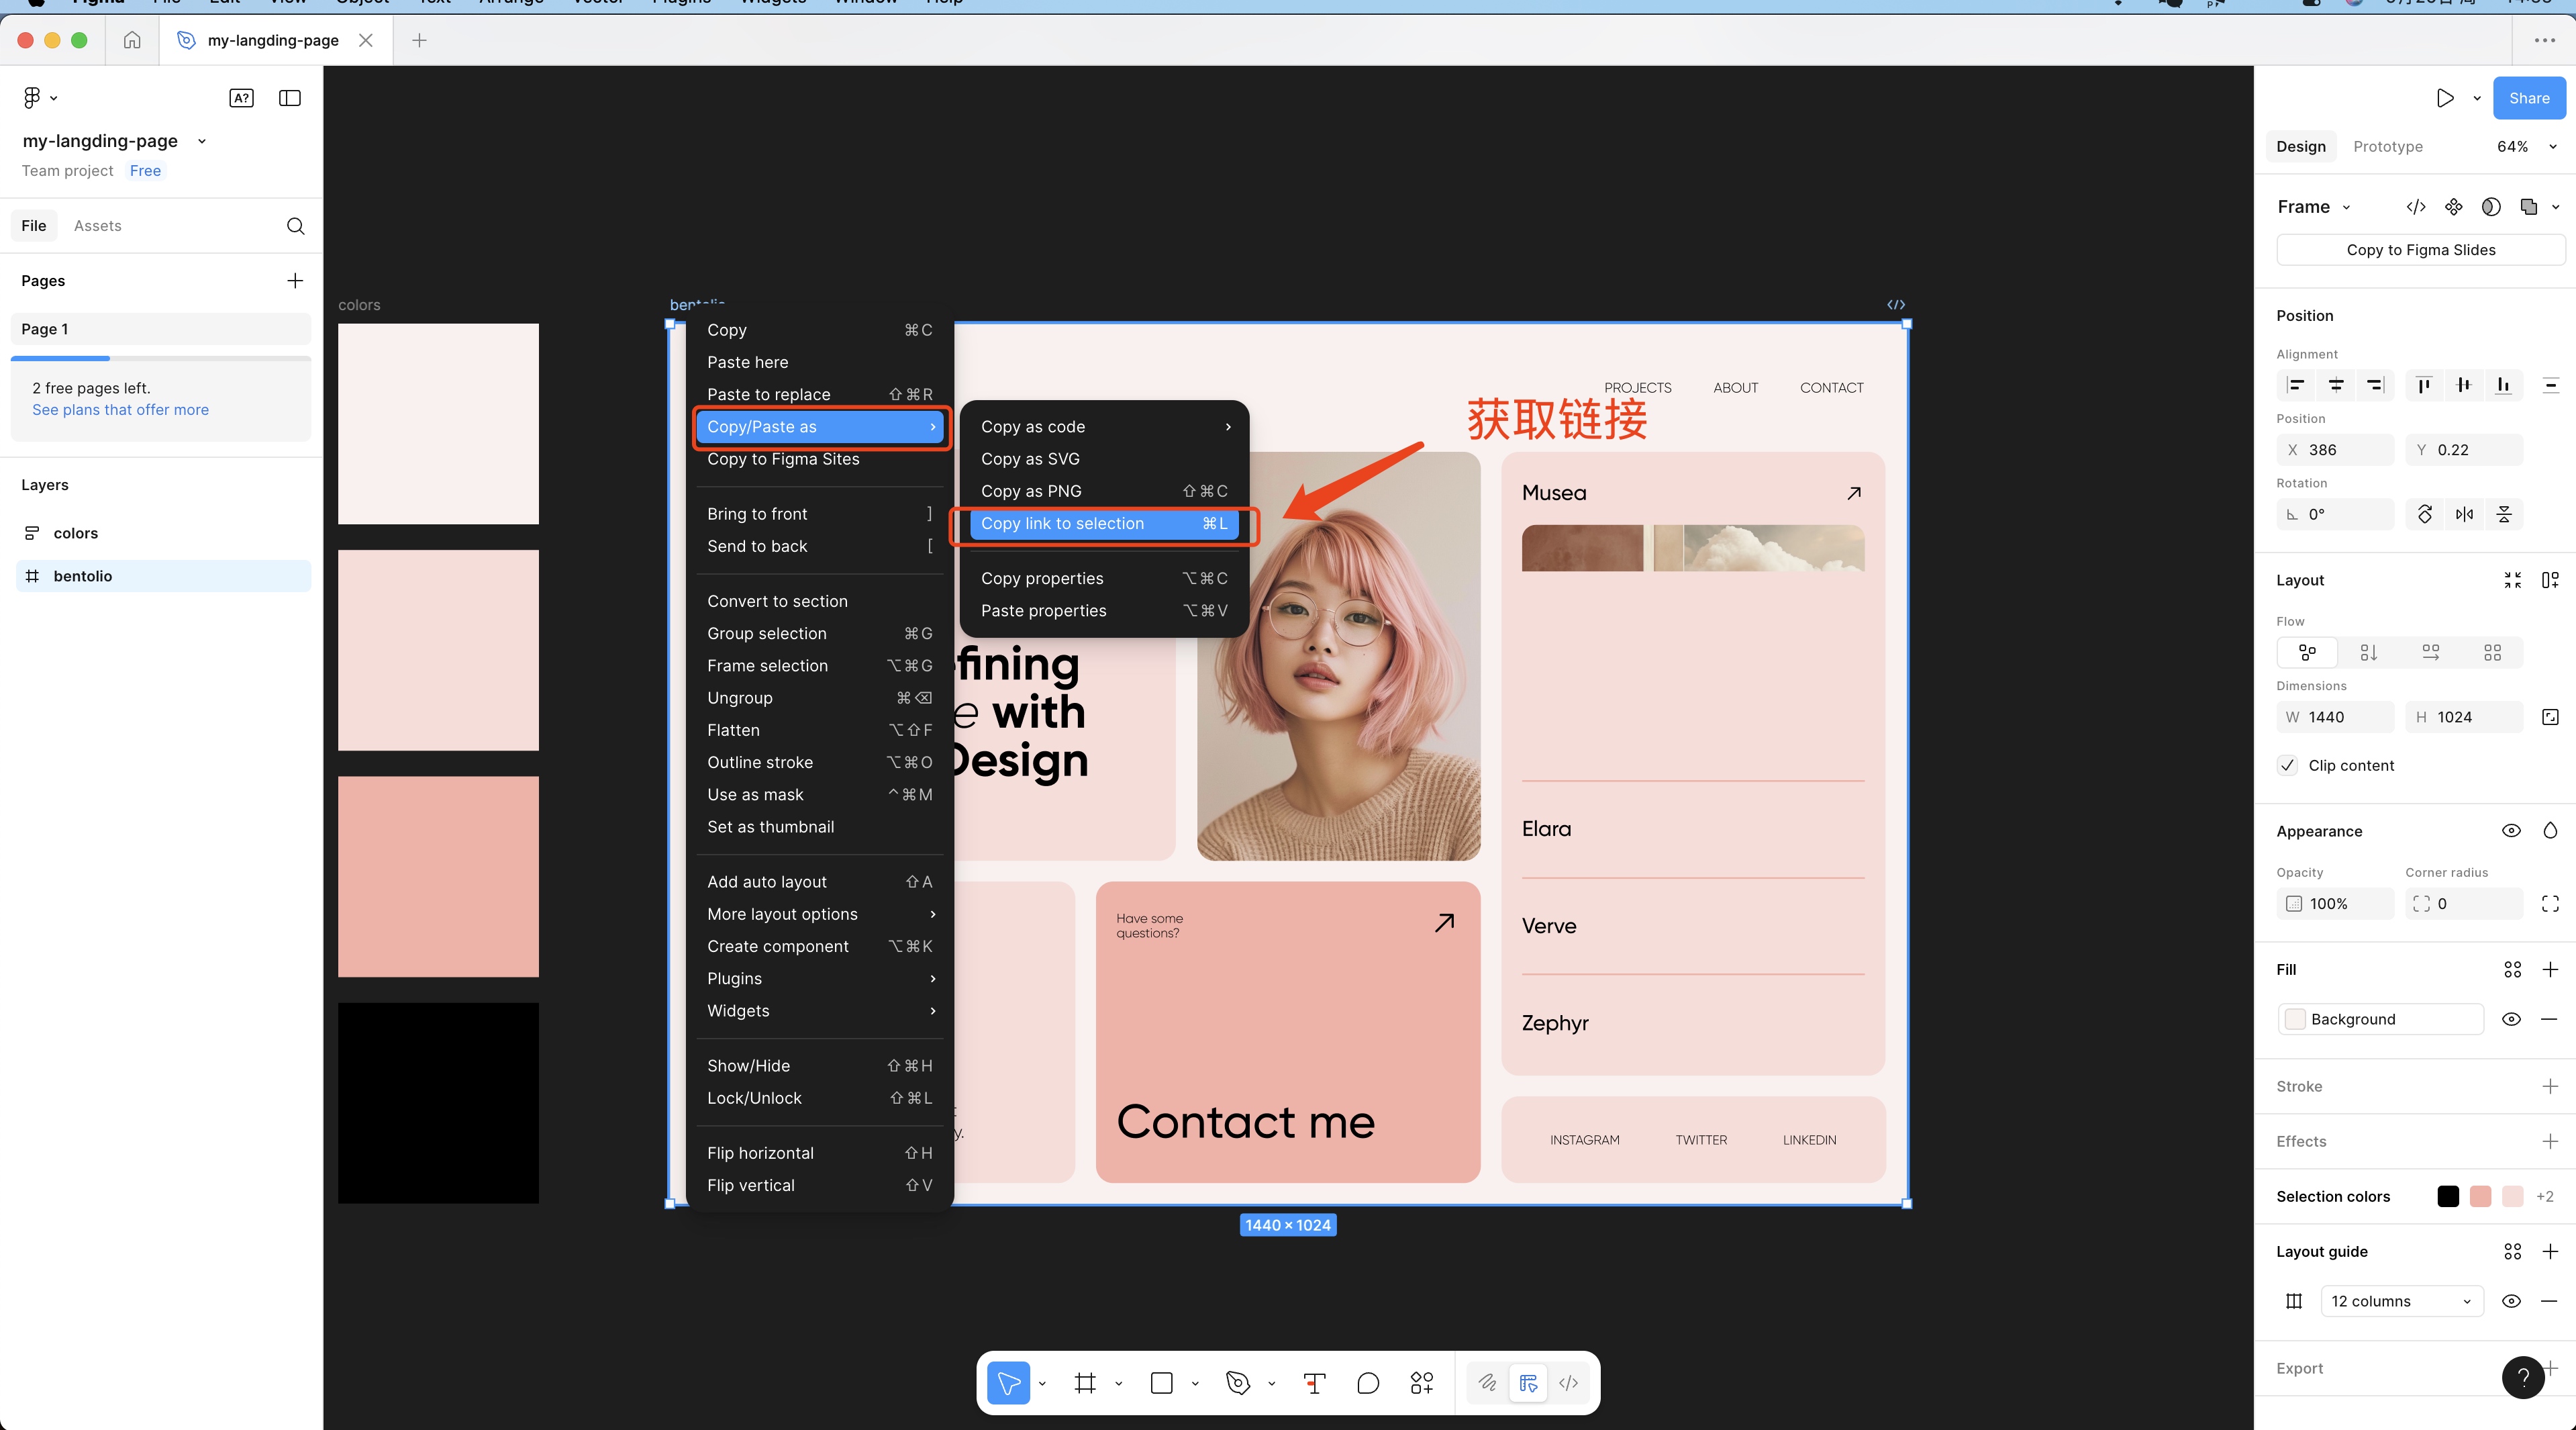
打开一个 Figma 项目,把你需要读取的提取链接给 LLM,参考图
Web:
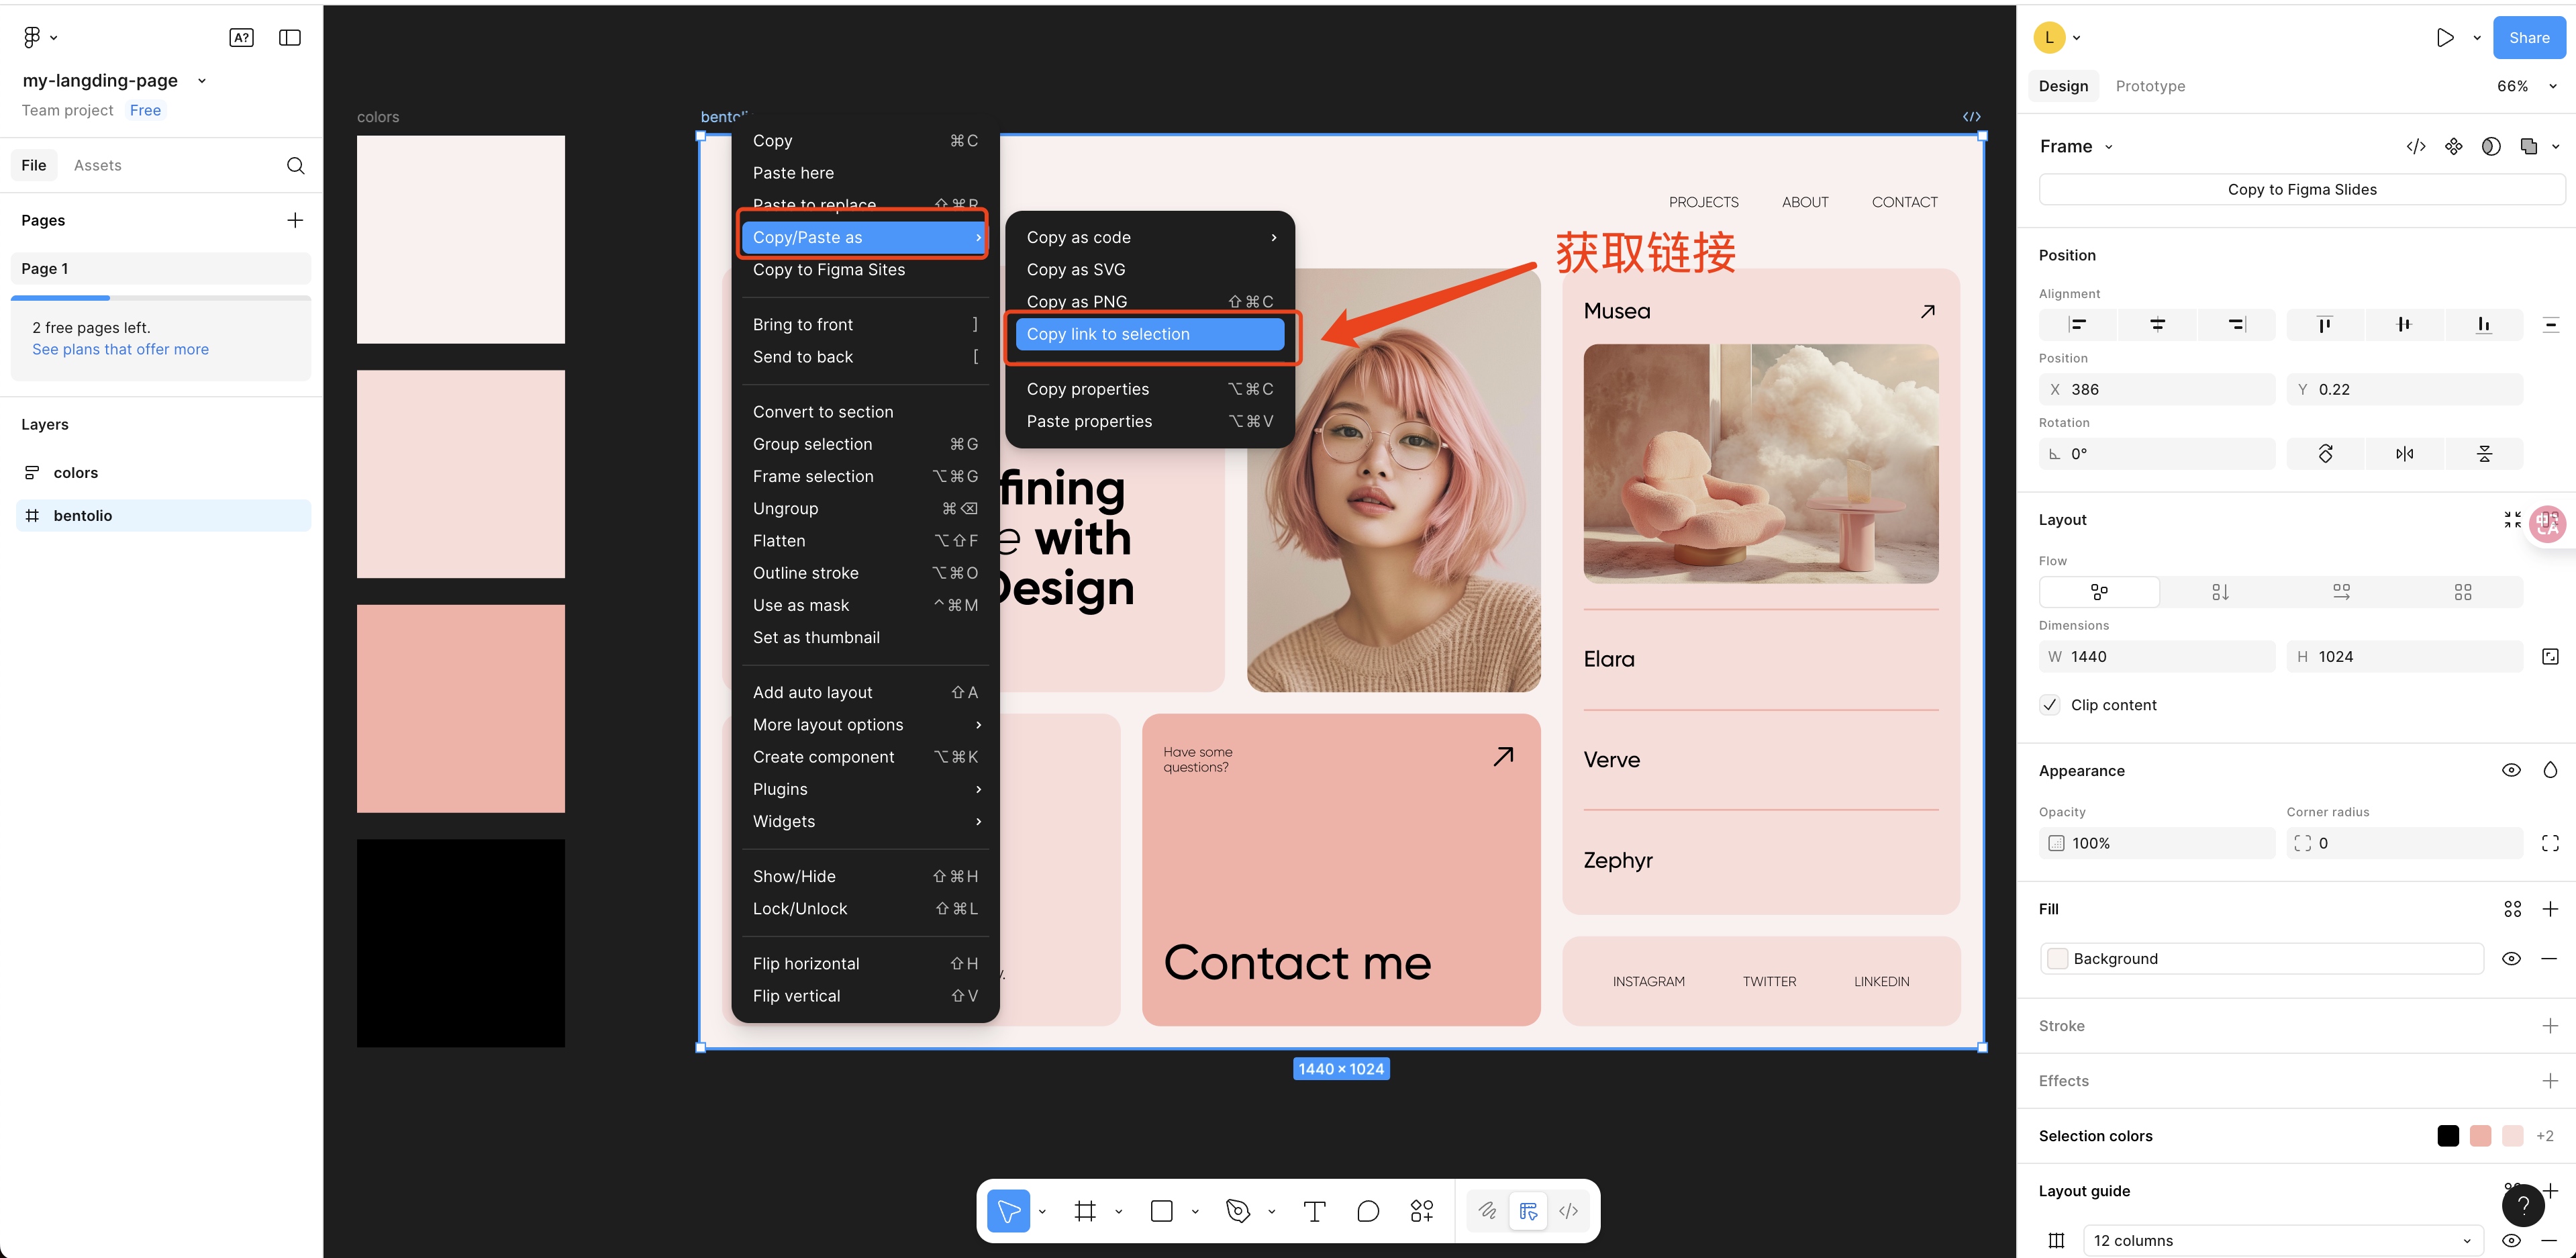
Desktop APP 有快捷键 CMD+L(Mac) | WIN+L(Windows)
然后在 Cursor Agent 里面直接提示:
读取 figma https://www.figma.com/design/YFANNpUxxx/my-langding-page?node-id=3-15&t=MYzLgxxx 。「你想做啥尽管说」建议屏幕截图 copy 到 agent 对话框,提醒 AI 参考图片,确保还原度。
读取 figma https://www.figma.com/design/YFANNpUxxx/my-langding-page?node-id=3-15&t=MYzLgxxx 。你需要参考图片进行 100% 还原,必须要一丝不苟的实现。「你想做啥尽管说」Stagewise
如果你想在你的前端项目,直接点击元素后提示 AI 修改代码 推荐使用 Github -stagewise-io/stagewise
安装 vs-code extension
cursor 是支持 vscode 插件的,因此你也可以去安装
here: https://marketplace.visualstudio.com/items?itemName=stagewise.stagewise-vscode-extension

前端项目注入 toolbar
你可以试试自动生成,我测试过很多次都没有成功,不太好用。
Auto-Install the toolbar (AI-guided):
- In Cursor, Press CMD + Shift + P
- Enter setupToolbar
- Execute the command and the toolbar will init automatically
我推荐有经验的同学,手动安装!
安装开发依赖:
pnpm i -D @stagewise/toolbarInject the toolbar into your app dev-mode:
// 1. Import the toolbar
import { initToolbar } from '@stagewise/toolbar';

// 2. Define your toolbar configuration
const stagewiseConfig = {
  plugins: [
    {
      name: 'example-plugin',
      description: 'Adds additional context for your components',
      shortInfoForPrompt: () => {
        return "Context information about the selected element";
      },
      mcp: null,
      actions: [
        {
          name: 'Example Action',
          description: 'Demonstrates a custom action',
          execute: () => {
            window.alert('This is a custom action!');
          },
        },
      ],
    },
  ],
};

// 3. Initialize the toolbar when your app starts
// Framework-agnostic approach - call this when your app initializes
function setupStagewise() {
  // Only initialize once and only in development mode
  if (process.env.NODE_ENV === 'development') {
    initToolbar(stagewiseConfig);
  }
}

// Call the setup function when appropriate for your framework
setupStagewise();
Nextjs:
// src/app/layout.tsx
import { StagewiseToolbar } from '@stagewise/toolbar-next';

export default function RootLayout({
  children,
}: Readonly<{
  children: React.ReactNode;
}>) {
  return (
    <html lang="en">
      <body>
        <StagewiseToolbar
          config={{
            plugins: [], // Add your custom plugins here
          }}
        />
        {children}
      </body>
    </html>
  );
}
NUXT:
// app.vue
<script setup lang="ts">
import { StagewiseToolbar, type ToolbarConfig } from '@stagewise/toolbar-vue';

const config: ToolbarConfig = {
  plugins: [], // Add your custom plugins here
};
</script>

<template>
  <div>
    <NuxtRouteAnnouncer />
    <ClientOnly>
      <StagewiseToolbar :config="config" />
    </ClientOnly>
    <NuxtWelcome />
  </div>
</template>
VUE:
// src/App.vue
<script setup lang="ts">
import { StagewiseToolbar, type ToolbarConfig } from '@stagewise/toolbar-vue';

const config: ToolbarConfig = {
  plugins: [], // Add your custom plugins here
};
</script>

<template>
  <StagewiseToolbar :config="config" />
  <div>
    <!-- Your app content -->
  </div>
</template>